Moodle Groups feature allows instructors to group students in many ways and for many activities.
- Students can be grouped in a meta course to separate students into groups for easier grading.
- Students can be grouped when working in teams in many other activities.
- You can allow a few students in a group to re-take a quiz on Moodle without opening to quiz to your whole class.
If you have groups enabled on your course, the only activities that will be specific to the groups are those that have the setting within the activity to "separate groups".
Examples:
- If you have a forum and the settings for groups are not enabled in both Group Mode and Grouping, then the forum acts as a normal forum where all students can interact together.
- If you have a wiki and within the settings you have the setting Separate groups enabled, then only those students within a group will be able to access the wiki - and they will only see the wiki for which their group is working on.
- If a student is not assigned to a group they will not be able to participate at all in the wiki until they are placed into a group.
How to Create a Group
- Navigate to Participants on the top of the page.
- Use the drop down menu and select Groups
- To add a group, click the Create group button under the left column.
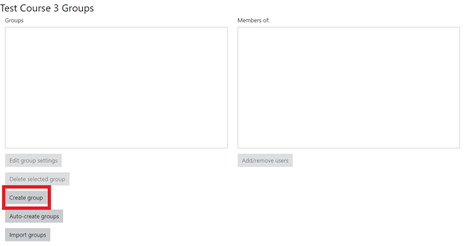
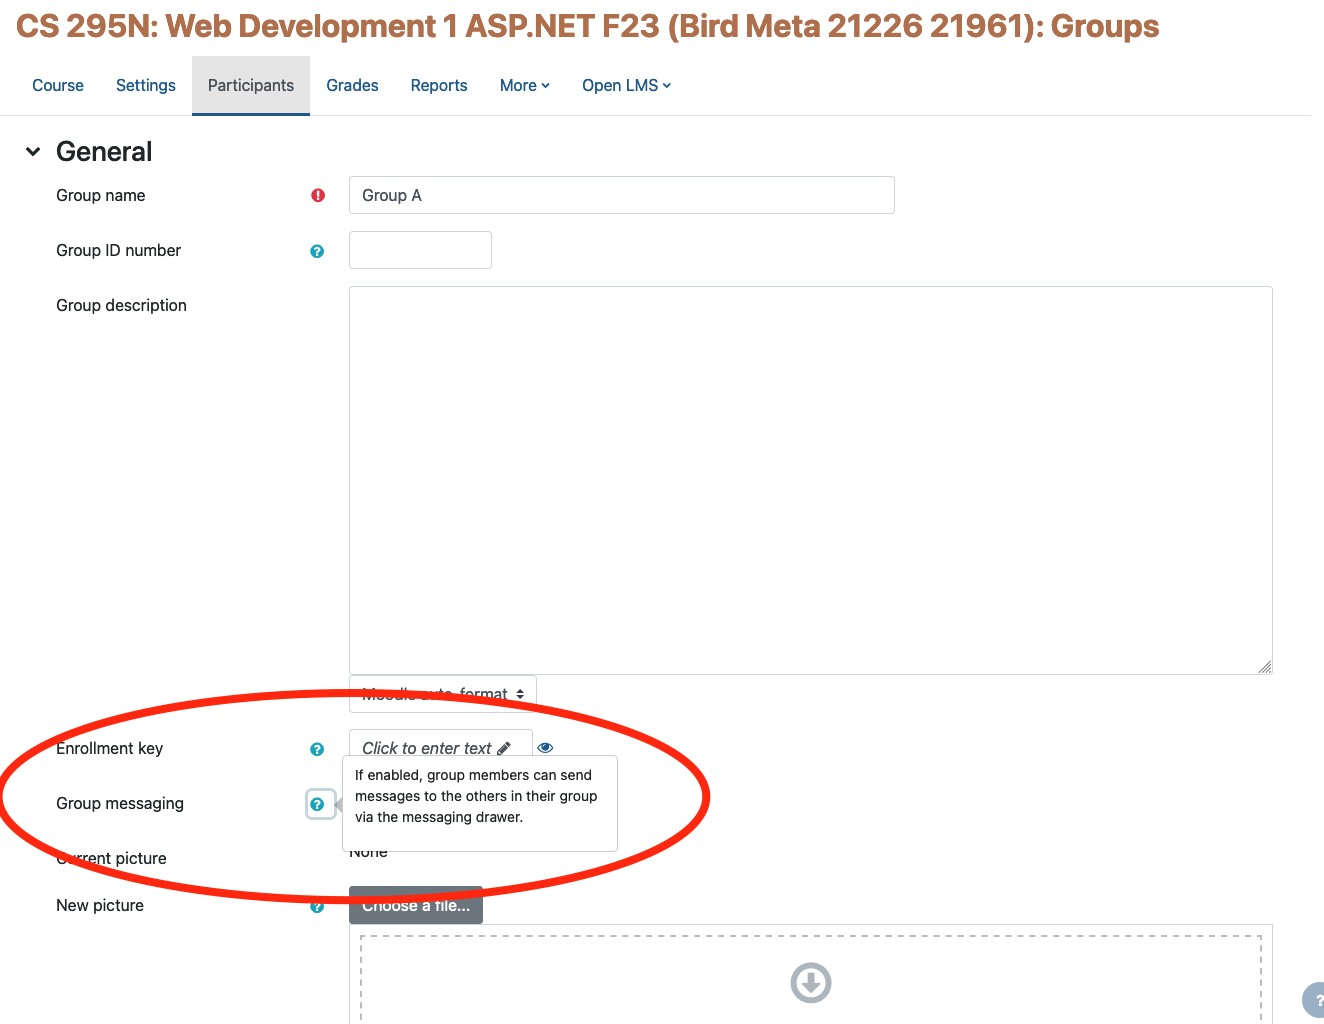
- Give the group a name and then click Save changes at the bottom of the page to save the group.
- If you want students to be able to collaborate in chat within their groups using Moodle messaging, make sure that you enable group messaging under the General settings.
How to Add Students to a Group
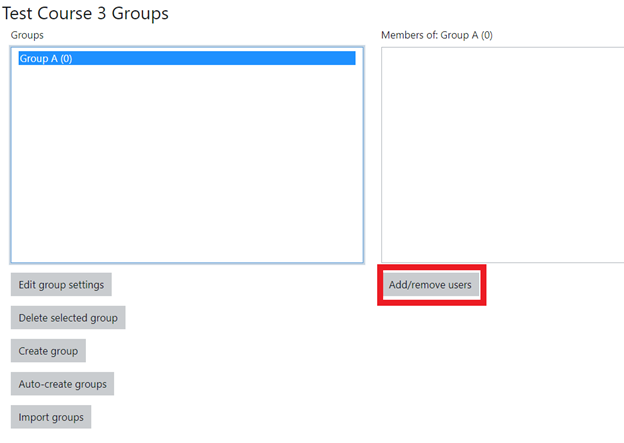
- Click on the group that you want to add students to and then click the add/remove users button under the right column.
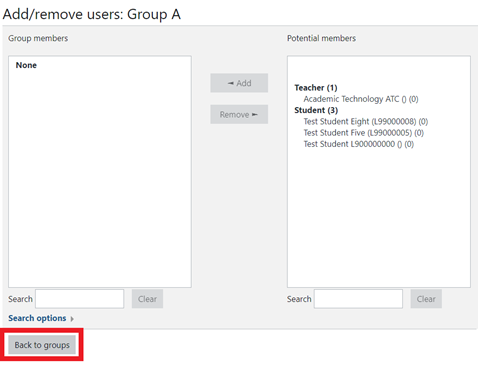
- Click the student's name that you want to add to the group and click the Add button between the two columns.
- Repeat step 2 until you have all the students that you want in the group.
- Once you have all the students in the group, click the Back to Groups button below the left column.
- Next to the group name you will see a number in parentheses that lets you know how many people are in the group.
- Clicking on the group name will show you exactly who is in the selected group.
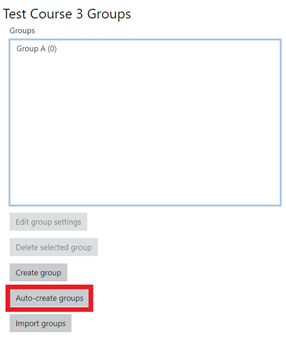
How to Create Auto-Generating Groups
- Go to your participants list in your Moodle course at the top of the page.
- Choose Groups from the drop down menu.
- Select Auto-Create Groups from the list underneath the left hand box
- For the Naming Scheme, you have to enter either Group @ or Group #. The @ sign represents letters, A, B, C, and D. The # represents 1, 2, 3, and 4. With these in place, the group name will be auto-created to match the number of students in each group.
- Change the setting for “Auto-Create based on” to the Number of groups (i.e. if you only want four groups but have 10 students, Moodle will generate the number of students in each group.)
Or you can change the settings to Members per group, where it depends on the number of students. Some of the last few groups could end up with less than the expected headcount of students. To make sure one group does not have less amounts of students, check the Prevent last smallest group. - Specify the Group/Member Count, meaning that you can specify exactly how many students you want in each group or the number of groups for students to be separated into.
- Click Submit once everything is to your standards, and then the groups will be auto filled.
Assigning Groups by CRN
If you are teaching multiple sections, and they have been combined into a metacourse, you can assign groups depending on what section the students are enrolled into.
- Go to your participants list in your Moodle course at the top of the page.
- Choose Enrollment Methods from the drop down menu.
- Find the linked section you wish to assign to a group, and click the pencil icon on the meta link.

- Either assign their group, or create a new group for them, via the Add to group drop down menu.
- Repeat for each linked course.
Due to how metacourses function, the 'parent' course will not appear in the Enrollment methods screen. In order to assign the students enrolled in the parent course to a group, first assign groups to all meta links, and then follow the instructions above for adding a user to a group. Select all students that are not in a group. In the example below, the highlighted users all have (0) next to their L#, indicating that they aren't in any groups yet - these are the ones that need to be added to the parent course's group.
If there are no students left who are not part of a course after assigning each enrollment method to its own group, then you do not need to do this step.
Using Groups
Sorting Your Grade Book
After assigning your students to groups, you can choose between groups in the grade book from a drop-down menu underneath the tabs "Grader Report" "Grade History" etc.
Group Activities
In the assignment, select Edit settings. Under the Group submission settings category you can customize the requirements that apply to the assignment.
Quizzes & Forums
Under the Common module settings category, select Separate groups as the group mode. Then hit the Add group/grouping access restriction button to open the Restrict access category and select which group you would like to allow or forbid access to the activity.
Attendance
For information on how to set up Attendance using groups click here.
For more information on Groupings click here.
ATC Support & Hours of Operation
Weekday Support, Monday - Friday
- Phone (voicemail only): 541-463-3377 (8am-5pm)
- Email: atc@lanecc.edu (8am-5pm)
- Find our updated hours and support options on the ATC Website
The ATC is open to in-person assistance. Support is available through the above remote options and on campus at CEN 208